If you visit the home page of this website on a desktop browser, you'll see a Javascript background animation that's generated on the fly. This is how it works.
While working on this personal website, I wanted to create a home page background that matched the site’s design. My old website had an animated one, so I wanted a new one to see how I’ve grown as a programmer since then. I also wanted to experiment with creating experiences in WebGL.
The finished product turned out to be a lot like I originally saw in my mind, but not without overcoming some obstacles.
As I was looking for a concept, my friends and I drove to Lake Tahoe to go stargazing. As a native New Yorker, I was completely surprised. I had never seen that many stars before and the idea for a homage to stargazing became clear. After several sketches and plans in my notebook, I was ready to start coding.
When coding creative projects, constant reiteration is required to build experiences that look and feel great. I like to have a “playground” section of code to hack together ideas with complete disregard for strict coding practices. This way, I can quickly get ideas out into the environment and iterate on behavior and motion design. Once things look good, I can rewrite the section into production code. This has the additional benefit of already knowing how to structure my code, and saves a bit of refactoring later on.
The animation is divided into three main phases:
- A rotating globe
- A starfield, a set of slow-moving points that form connections with nearby neighbors
- A deer constellation formed out of the stars
All of the objects in the phases are composed of invisible nodes and visible connections. I keep track of the phases with a global _stage object. Note how a TRANSITION property is added. This stage is used in between the other stages to determine how to move the nodes to a new stage.
var STAGE = {
    TRANSITION: 0,
    SPHERE: 1,
    STARFIELD: 2,
    STAG: 3
};
var _stage = STAGE.SPHERE;

// ...

var render = function () {
    renderID = window.requestAnimationFrame( render );
    if (window.innerWidth <= 991) {
        cancelAnimationFrame(renderID);
    }
    var ctx = canvas.getContext("2d");
    ctx.clearRect(0, 0, canvas.width, canvas.height);

    switch(_stage) {
        case STAGE.TRANSITION:
            renderTransitions(ctx);
            break;

        case STAGE.SPHERE:
            renderSphere(ctx);
            break;

        case STAGE.STARFIELD:
            renderStarfield(ctx)
            break;

        case STAGE.STAG:
            renderStag(ctx);
            break;
    }

    var timeElapsed = Date.now() - startTime;
    if (timeElapsed > 8000 && _stage == STAGE.SPHERE)
        startTransition(STAGE.STARFIELD);
    else if (timeElapsed > 18000 && _stage == STAGE.STARFIELD)
        startTransition(STAGE.STAG);
    renderer.render(scene, camera);
};
I worked on each stage chronologically.
Sphere
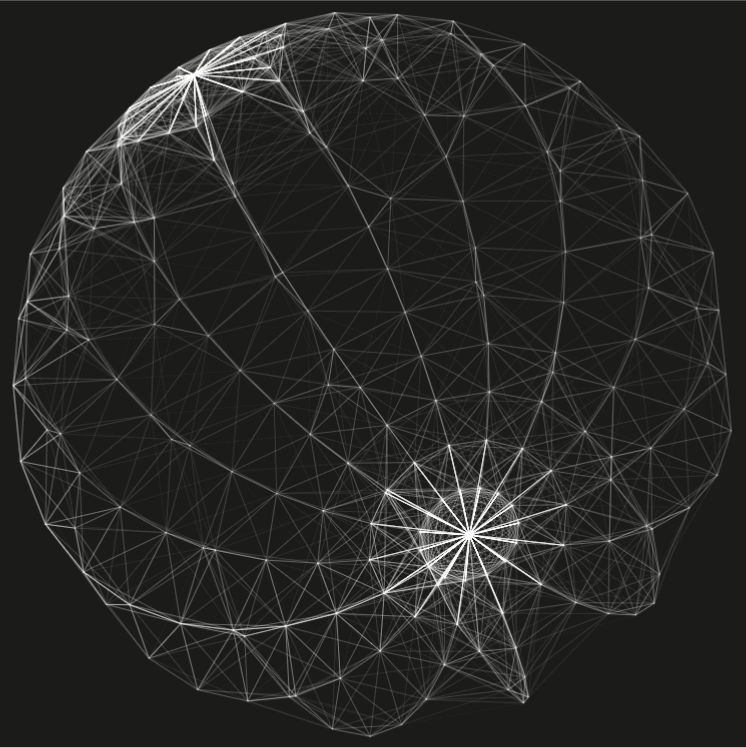
The nodes that make up the sphere actually live in 2D space, but I had to use a 3D object to control the motions of the nodes.
sphereM = new THREE.Mesh(new THREE.SphereGeometry(300, 15, 15));

function renderSphere (ctx) {
    vertices = [];
    genProjectedVertices(sphereM, vertices);
    drawConnections(closeEnough, ctx);
    sphereM.rotation.x = mouseY;
    sphereM.rotation.y = mouseX;

    sphereM.rotation.x += sphereX;
    sphereM.rotation.y += sphereY;

    sphereX += 0.001;
    sphereY += 0.001;
    sphereM.rotation.z += 0.001;

}
I use three.js to generate a 3D sphere mesh, and then I project the vertices of the mesh into a 2D plane. Then I draw connections between all vertices within a certain distance of each other. The closer two vertices are, the brighter the line between them.
function genProjectedVertices (model, projectedVertices) {
    model.updateMatrixWorld();
    for (var i = 0; i < model.geometry.vertices.length; i++) {
        var b = model.geometry.vertices[i].clone();
        b.applyMatrix4(model.matrixWorld);
        b = projectToScreen(b);
        delete b.z;
        projectedVertices.push(b);
    }
}

function drawConnections (distanceThreshold, ctx) {
    for (var i = 0; i < vertices.length; i++) {
        for (var j = i + 1; j < vertices.length; j++) {
            var dist = distanceBetweenDimTwo(vertices[i], vertices[j]);
            if (dist < distanceThreshold) {
                ctx.strokeStyle = '#ffffff';
                ctx.globalAlpha = map_range(dist, 0, distanceThreshold, 0.5, 0);
                drawLine(vertices[i], vertices[j], ctx);
            }
        }
    }
}

function projectToScreen (threeDimPoint) {
    var point = threeDimPoint.clone();
    var winWidthHalf = (document.documentElement.clientWidth/2);
    var winHeightHalf = (document.documentElement.clientHeight/2);
    point.project(camera);
    point.x = ( point.x * winWidthHalf ) + winWidthHalf;
    point.y = - ( point.y * winHeightHalf ) + winHeightHalf;
    point.z = 0;
    return point;
};

function map_range (value, low1, high1, low2, high2) {
    return (low2 + (high2 - low2) * (value - low1) / (high1 - low1));
}

function distanceBetweenDimTwo (p1, p2) {
    return sqrt(p(p1.x - p2.x) + p(p1.y - p2.y));
}
Starfield

The code here is simpler, where I just move a set of nodes randomly. If a single node reaches the edge of the screen, it turns back in the other direction. The behavior for drawing connections is the same as the sphere’s behavior.
var numStars = (canvas.width * canvas.height > 550000) ? 500 : 256;

for (var i = 0; i < numStars; i++) {
    starFieldM.push({
        x: (Math.random() * canvas.width),
        y: (Math.random() * canvas.height)
    });
    starVelocities.push({
        dx: (Math.random() * 0.4 - 0.2),
        dy: (Math.random() * 0.4 - 0.2)
    });
}

function renderStarfield (ctx) {
    vertices = [];
    for (var i = 0; i < starFieldM.length; i++) {
        starFieldM[i].x += starVelocities[i].dx;
        starFieldM[i].y += starVelocities[i].dy;
        if (starFieldM[i].x < 0 || starFieldM[i].x > canvas.width)
            starVelocities[i].dx *= -1;
        if (starFieldM[i].y < 0 || starFieldM[i].y > canvas.height)
            starVelocities[i].dy *= -1;
        vertices.push(starFieldM[i]);
    }
    drawConnections(closeEnough, ctx);
}
Transitioning
To transition between stages, we look at the next stage’s vertices to generate a set of _goalPoints. Then, each current node we have is assigned to one point of the _goalPoints and begins to move to its goal point.
I made the movement of the nodes feel more natural by following Google’s Material Motion Design Handbook. When the nodes start moving, they start from a slow speed and accelerate. When the nodes stop, they decelarate to a stop.
Once all of the nodes have reached their respective goal points, then the transition ends and we set _stage to the next stage.
Deer
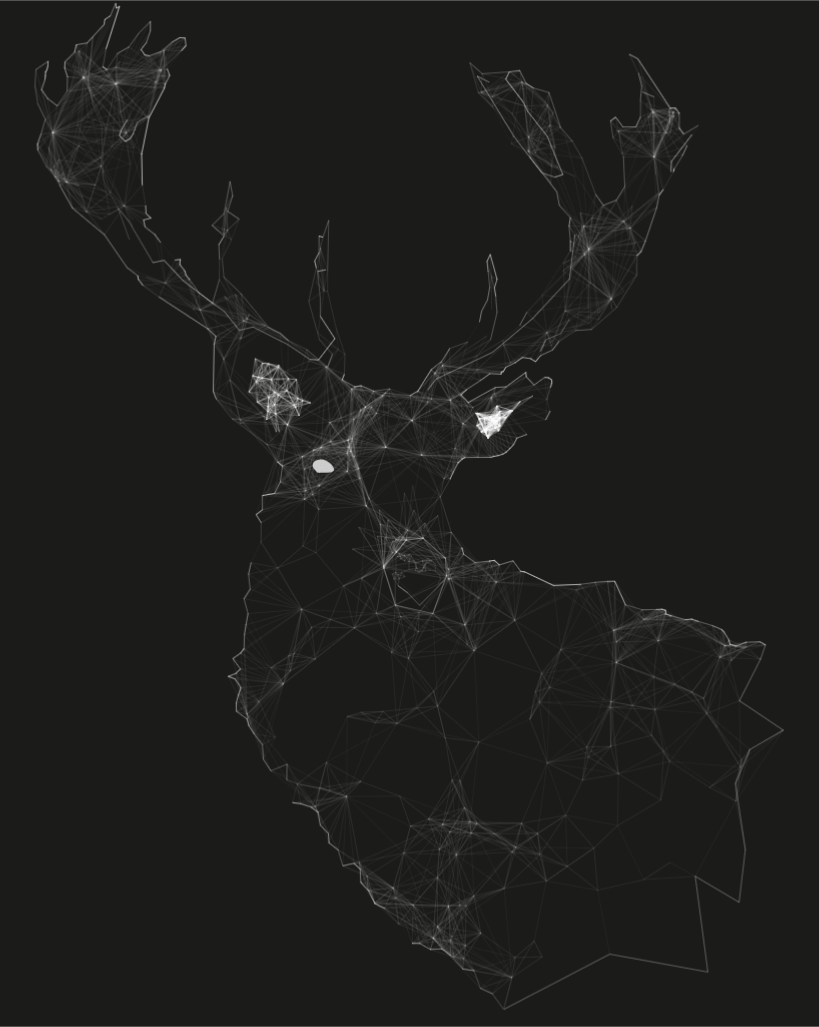
Drawing the deer out of nodes was the most complicated part. I modeled the general parts of the deer in Blender, and exported it into a JSON format for three.js to import.
When I had the vertices for the deer, I set the outside boundary points as the goal points for the transition. Then, I generated several uniformly random points inside the deer.
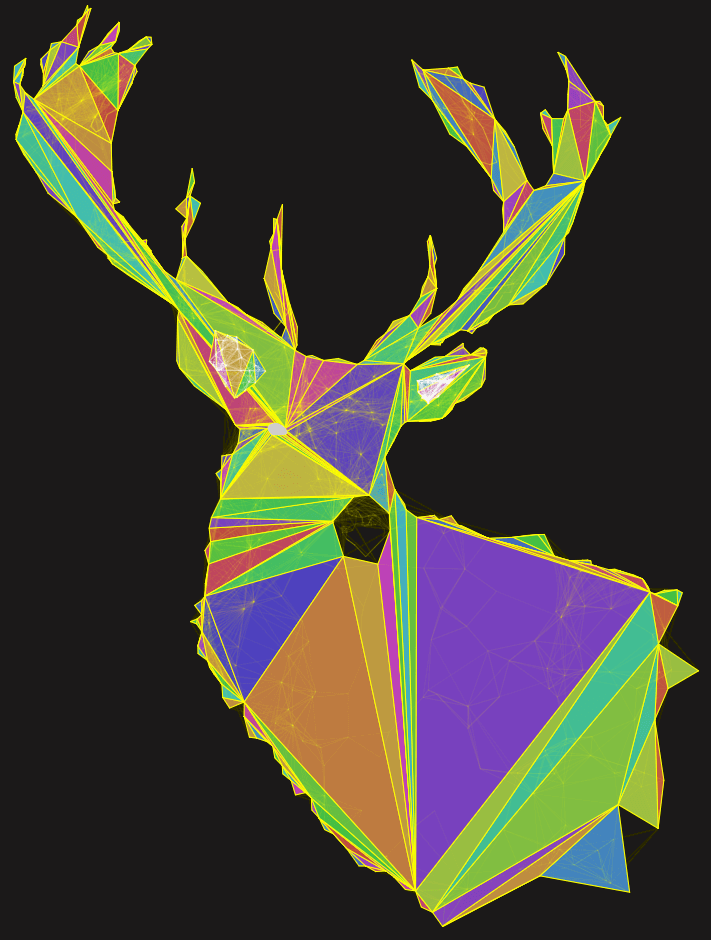
But how does one get a random point inside an irregular polygon? I used three steps:
- Generate an array of triangles that cover the same area as the deer. I found an open source polygon triangulation library called Earcut
- Randomly select which triangle to use, weighted by its area. For instance if triangle A is 75% of the area and triangle B is 25% of the area, triangle A should be picked 75% of the time and B should be 25%. The snippet below does this
- Select a random point within that triangle
function genRandPtFromTriangles (array, triObj, upperRandBound) {
    var x;
    if (upperRandBound) {
        x = Math.random() * upperRandBound;
    } else {
        x = Math.random();
    }

    var index = -1;
    // if upperRandBound isn't set, x is a random float between 0 and 1.
    // triObj.aR consists of the area ratio of the triangle area : parent polygon area
    // for example, if a triangle had 50% of the area it would be 0.5
    // loop though 🔺s and subtract area ratios from x until negative
    while (x >= 0 && index <= triObj.aR.length - 1) {
        x -= triObj.aR[++index];
    }

    var a = triObj.v[triObj.i[index][0]];
    var b = triObj.v[triObj.i[index][1]];
    var c = triObj.v[triObj.i[index][2]];
    // gen rand pt in triangle

    // from https://math.stackexchange.com/questions/18686/uniform-random-point-in-triangle
    var r1 = Math.random(), r2 = Math.random();
    a = pointAdd(scalarPtMultiply(1 - sqrt(r1), a),
                 scalarPtMultiply(sqrt(r1) * (1 - r2), b));
    array.push(pointAdd(scalarPtMultiply(sqrt(r1) * r2, c),
                        a));
}
After that, I added more random points to bring out the head and ears of the deer. The eye was completely filled in, and I manually drew out a few lines in Blender for the snout.
If you’d like to see the source code for the animation, check it out here. You can also view the animation on desktop only here.